Procure to Pay process which is also known as P2P cycle is followed by any organization in any ERP system if they would like purchase any products (it could raw materials, office supplies, infrastructure etc). Of course when there is a purchase there should be a payment. This entire process of purchasing a product and making payment for that product to supplier is called procure to pay process.
Watch the procure-pay-cycle-video

Article with 11i screen shots: Procure to Pay Cycle 11i

Query: Procure to Pay Cycle Query
Though this process is not specific to oracle ERP system, screen shots shown in the below are from Oracle ERP.
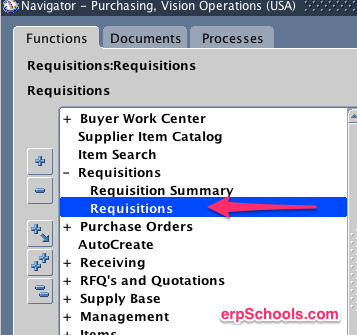
- Create Requisition
- Create Purchase Order
- Create Inventory Receipt
- Enter AP Invoice
- Make Payment
- Transfer to GL
Enter the below information like requisition type and item details as shown below
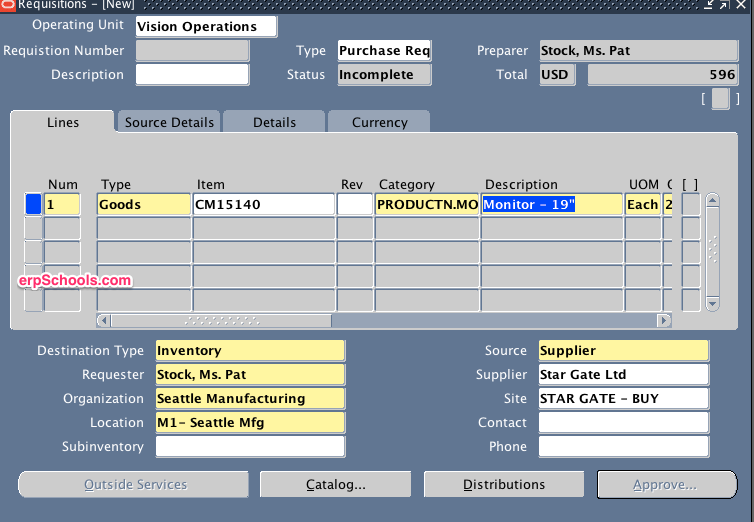
Enter Quantity and Save Requisition. You can save the requisition number at this stage.
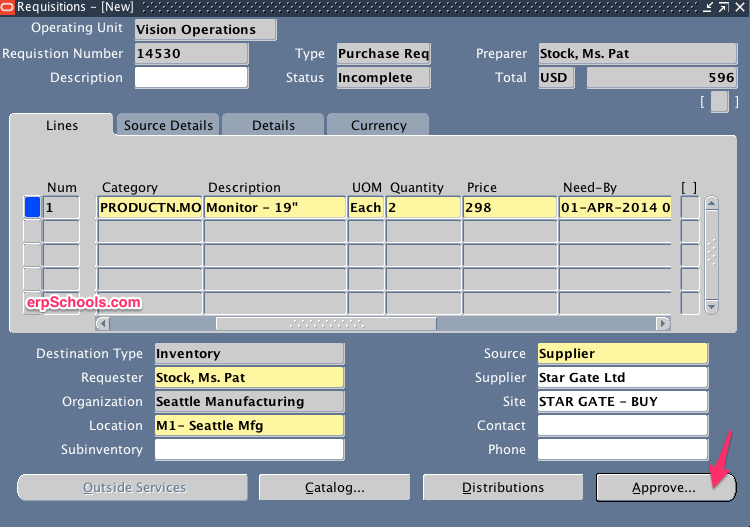
Click Approve button and Submit for Approval
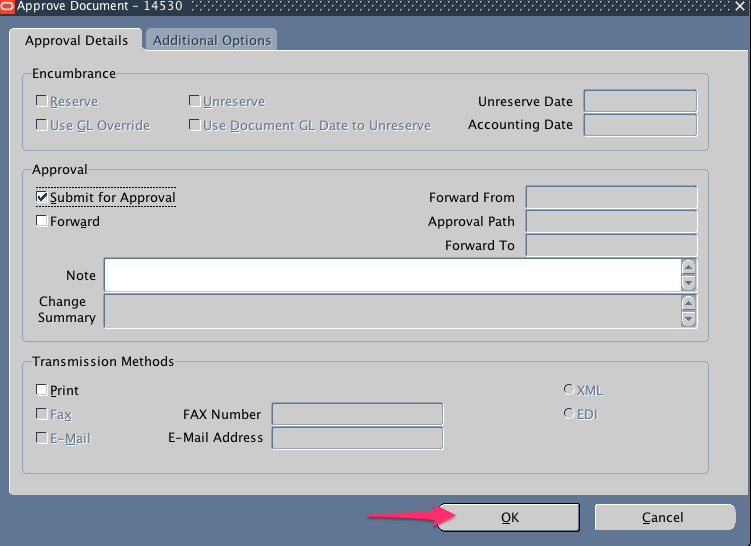
Once requisition is approved we will not be able to open the requisition again. We can check the requisition details in Requisition summary form.
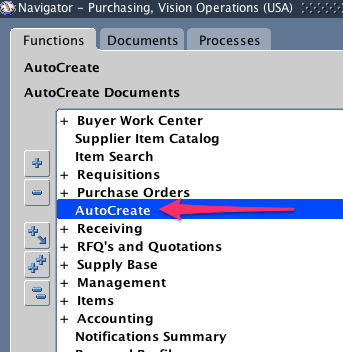
Navigation: Purchasing Responsibility > Autocreate
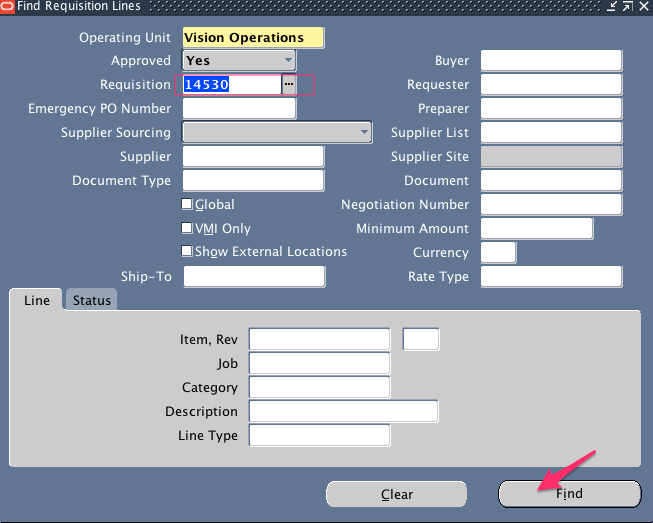
Enter requisition number which is saved and hit TAB to ensure you requisition is valid. Make sure you empty the Ship-To and Buyer fields as it might add un-necessary condition to your search query.
Once you find the requisition select it by enabling the checkbox and choose the type of document you want to create. In this example we are converting requisition into “Standard Purchase Order”. You also have the option to convert requisition into RFQ.
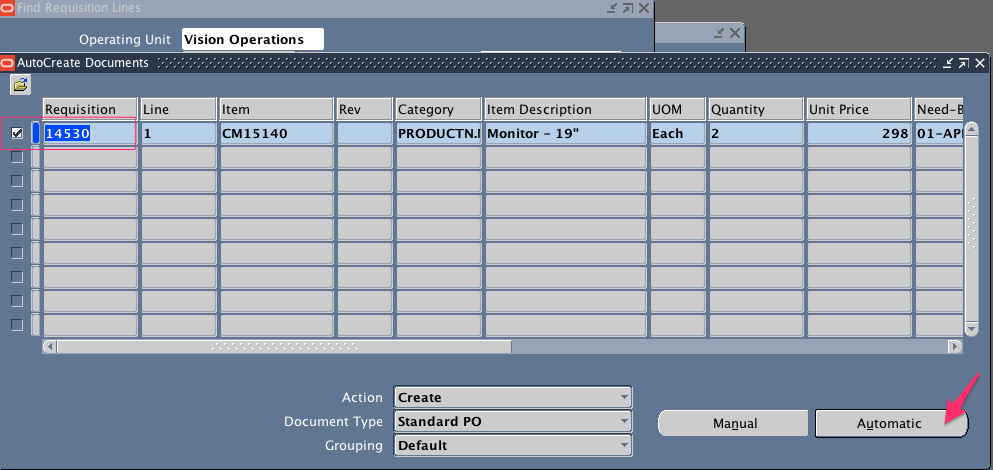
Choose automatic if you wish to convert this single requisition into one purchase order. Choose manual if you want to add multiple requisitions into one purchase order.
In the below screen you can choose the supplier and supplier site. If you skip here you will need to enter on Purchase Order form before you submit PO for approval.
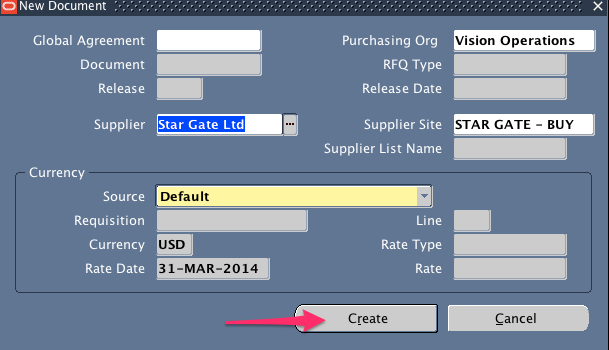
Once you click on Create button all requisition information is transferred to Purchase Order Form.
Select Ship-To field carefully as this is required to create inventory receipt / purchasing receipt.
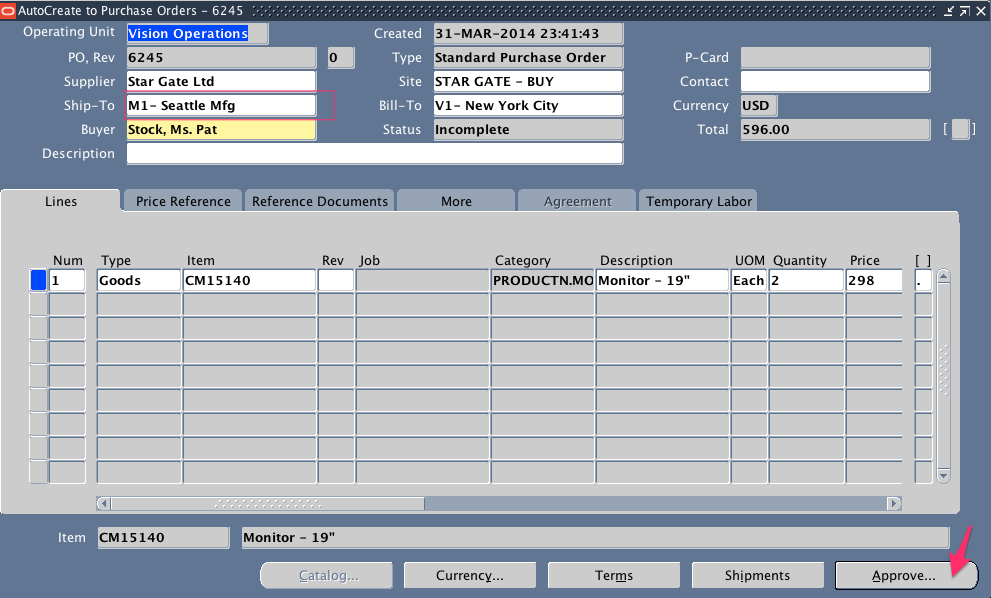
Click Approve button and submit for approval. Assuming that you have enough $ limit or it is approved by concerned person we will move on to next step.
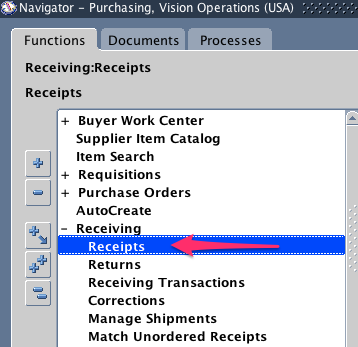
Now PO being sent to Supplier , we can expect the products to be delivered to us. Once items / products are delivered to us we will create Receipt to record the details of the products received.
We can create Receipt in purchasing module or inventory module.
Navigation: Purchasing Responsibility > Receiving > Receipts
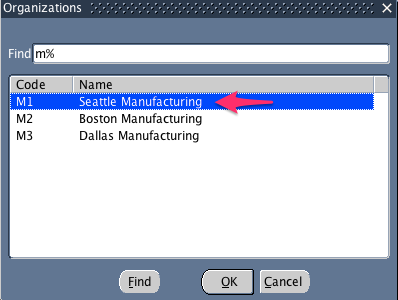
Select the organization that you have selected in “Ship-To” filed of Purchase order
Enter the Purchase order number on find screen and find it.
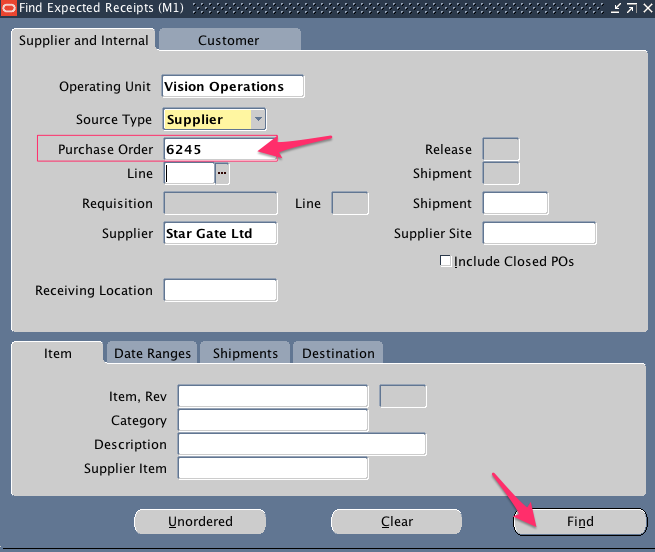
If your PO is found then it will open “Receipt Header” and “Receipts” form.
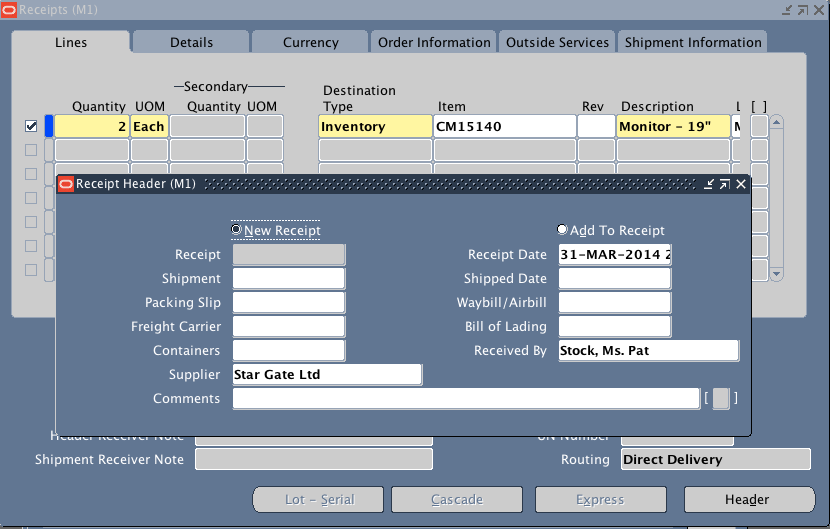
Move Receipt Header form side and check the line you would like to receive. If sub inventory is not defaulted automatically choose sub inventory in which you would like to receive the material like FGI, Stores etc.
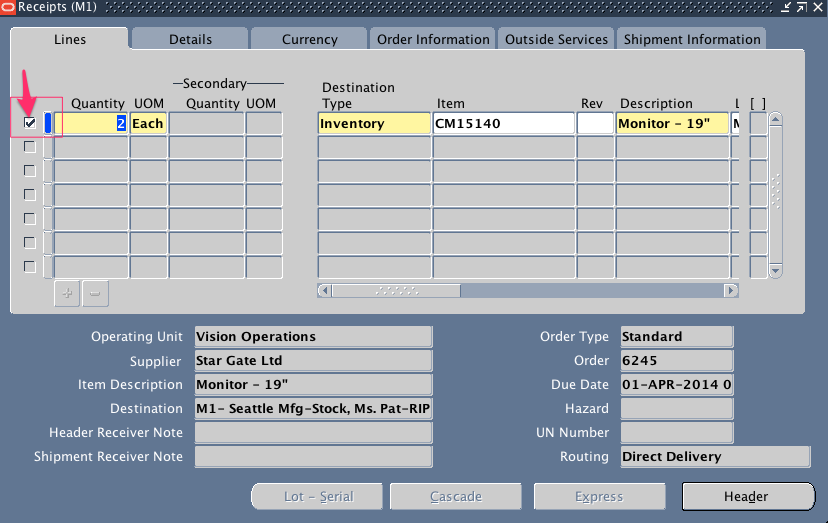
Once you enter all the information Make sure to Save the Receipt.
Once you create a receipt for PO you will not be allowed to create another receipt for the same PO. It is allowed only in case of partial receipts.
Along with items / products supplier will also send Invoice asking for payment.
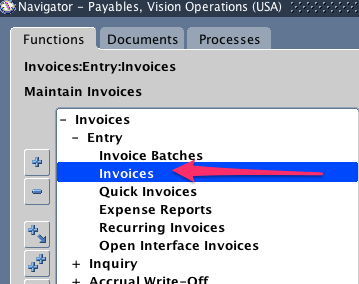
Navigation: Payables Responsibility > Invoices > Entry > Invoices
Enter the information as per the document (Invoice) received from supplier
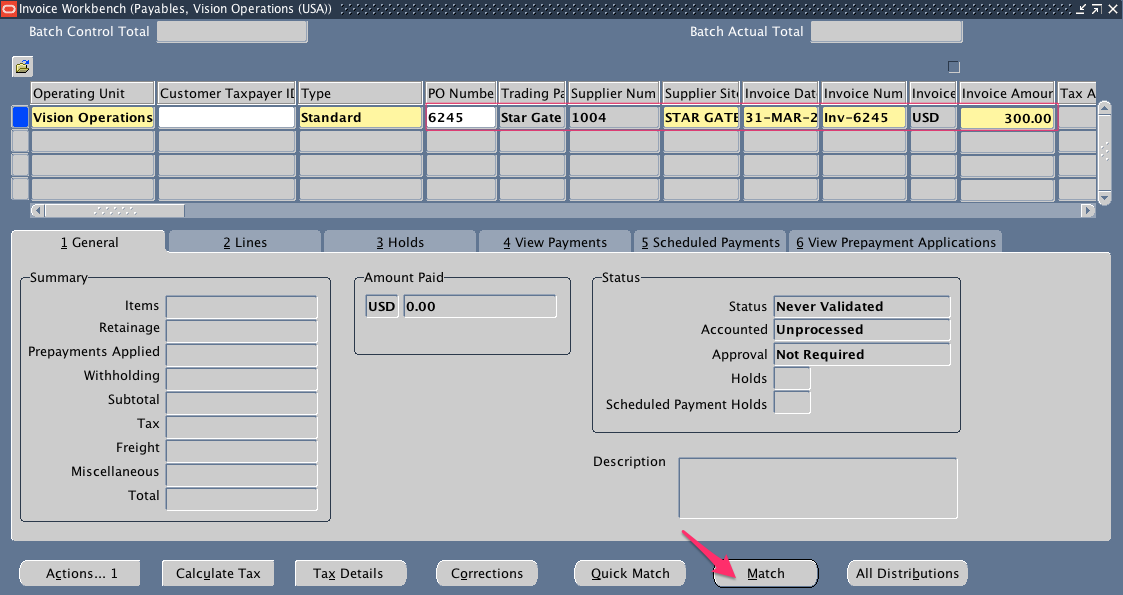
Once the header information is entered we will match the invoice with purchase order by clicking Match button.
Enter Purchase Order Number and Find it.
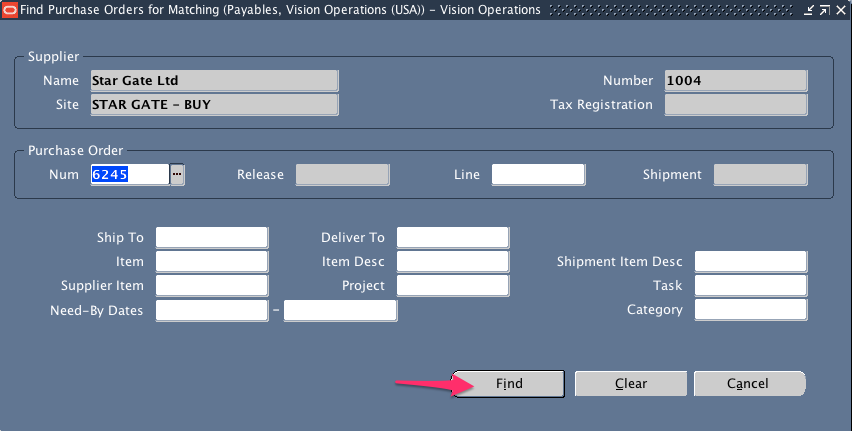
Once the PO is found select the “Match” checkbox and click Match button at the bottom.
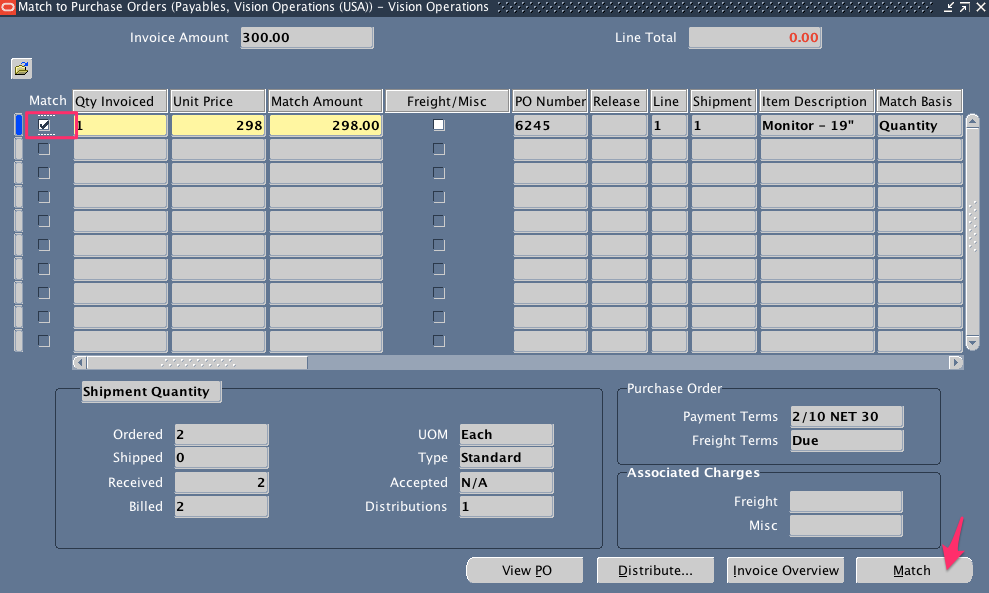
Once the PO is matched you can see the Total amount in General Tab as shown below.
Click Calculate Tax button to add any tax if it is applicable.
The total amount on header should be equal to total of line amounts.

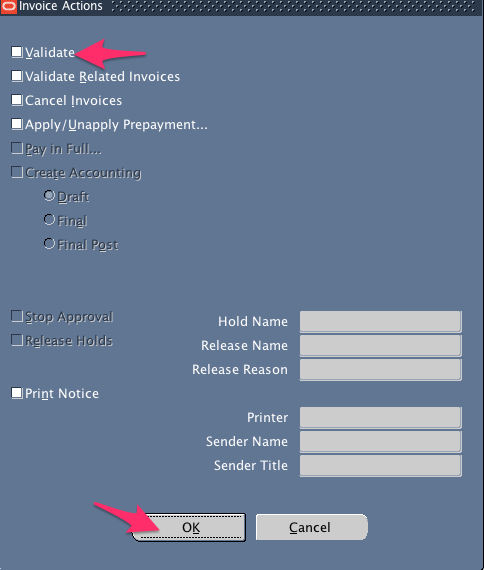
Click Actions Button and Select Validate option.
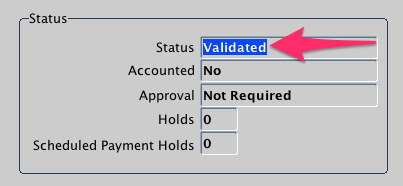
Make sure Invoice is validated correctly as shown below.
 ‘
‘
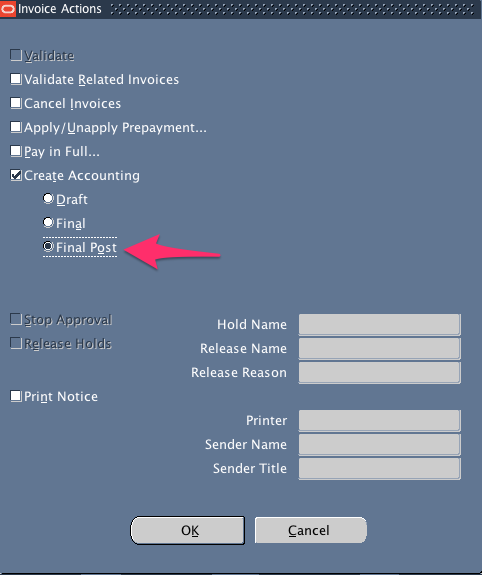
Again click on Actions button and this time select “Create Accounting” option. choose Final Post to send accounting information directly to GL and post.
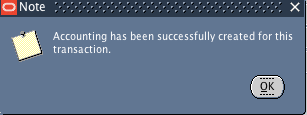
Once accounting is successful you will be greeted with the following message.
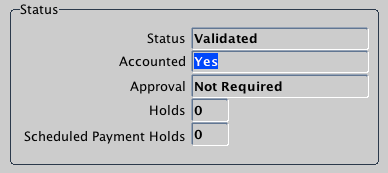
Now in General Tab of Invoice you should be able to see the Status as below.
Normally any company will wait for the due date to make payment. If we choose to pay ahead also we can pay it.
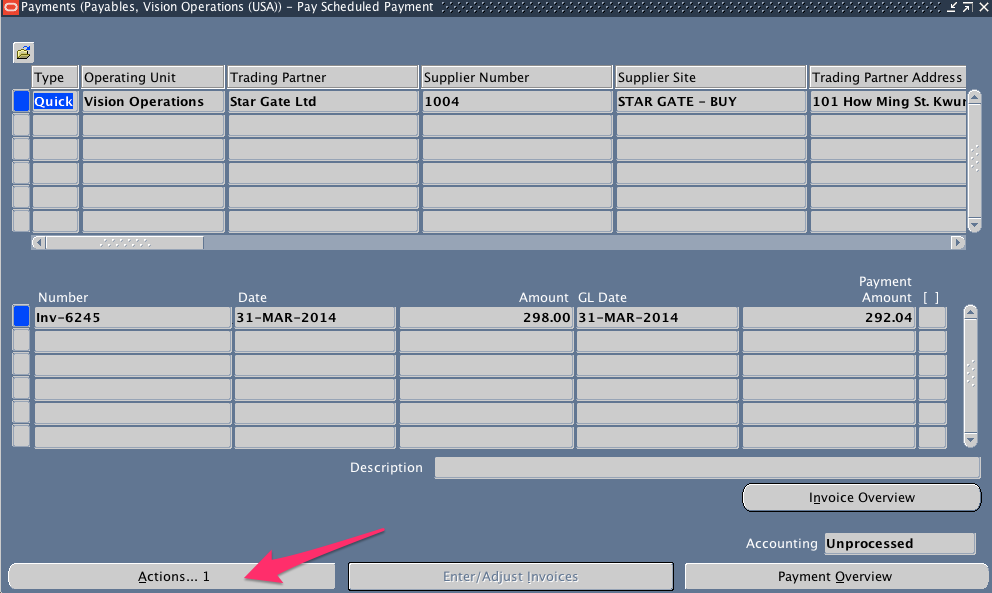
Navigation: Scheduled Payments > Pay..1

Payments form will open as shown below.
Enter Payment Method and payment process profile details
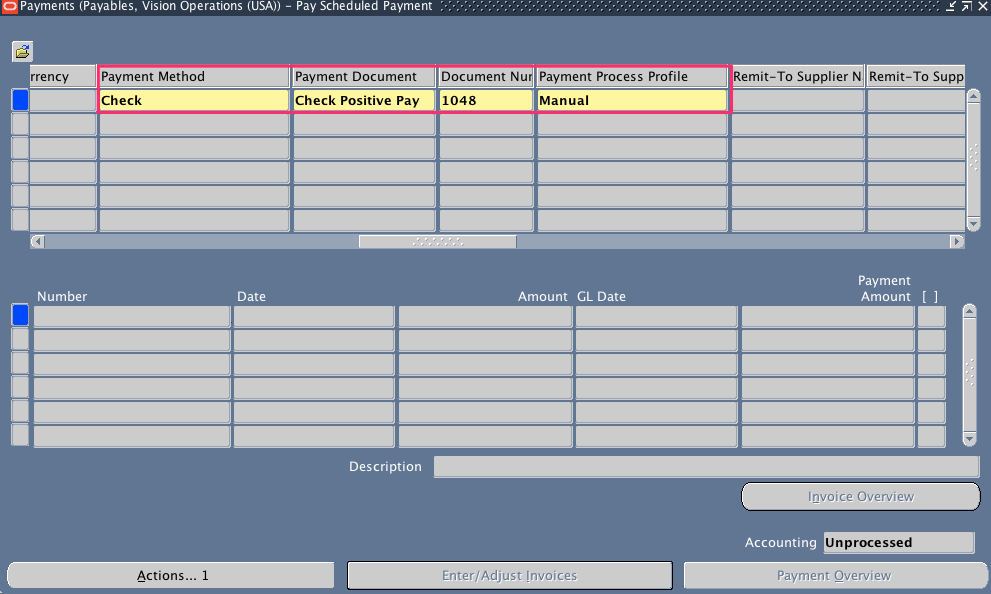
Save your payment by clicking SAVE button.
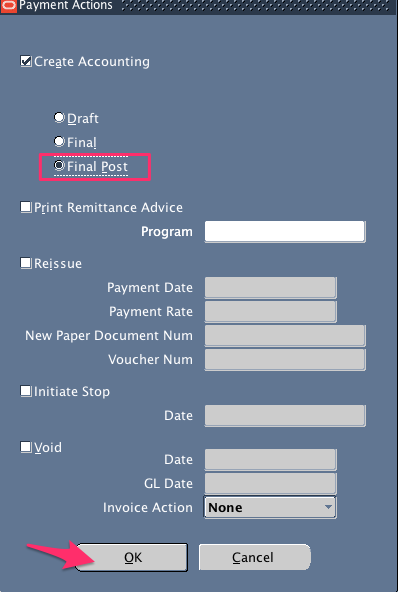
Once payment is done we need to create accounting.
Click Actions button and select Final Post.
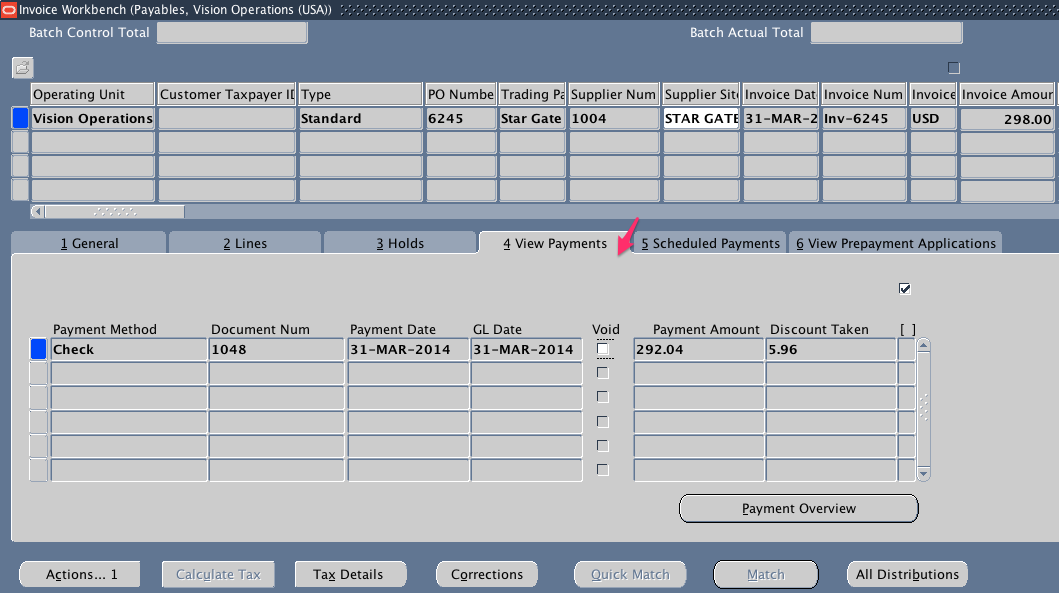
Finally, Make sure your payment is recorded in “View Payments” tab of your invoice. You might need to re-query your invoice to see this information.
If you have any questions / comments please let us know in the comments section.