Folders in Oracle Forms:
Folders let you do the below:
1.Control how you want the data to be displayed in the form meaning what columns should be displayed, what should be width of the columns, sequence of the columns, what should be the prompt for each of these columns etc.
2. Control what data should be displayed in the form like only posted journals or posted journals for a particular period etc. Folders let you automatically fetch data as per the specified criteria without having to type in the criteria every time.
Folder Controls:
Navigation: Any Oracle Form > Click on Folder in the Menu
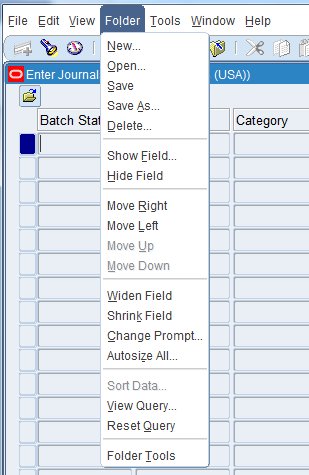
New: Create a new folder
Open: Open an existing folder
Save: Save the changes made to the current folder
Save As: Save current folder definition to a new name.
Delete: Delete an existing folder.
Show Field: Display a field that is hidden.
Hide Field: Hide the current field.
Move Right: Move the current field to the right.
Move Left: Move the current field to the left.
Move Up: Move the current field to up.
Move Down: Move the current field to down.
Widen Field: Increase the width of the current field.
Shrink Field: Decrease the width of the current field.
Change Prompt: Change the prompt for the current field.
Autosize All: Adjust the widths of all fields to completely show their data.
Sort Data: Specify the order in which the data should be displayed.
View Query: Display the query criteria for the current folder.
Reset Query: Remove the current query criteria.
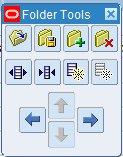
Folder Tools: Displays the folder tool palette as seen below which will have options to Open Folder, Save Folder, New Folder, delete folder, Widen field, Shrink field, Show field, Hide field, Move up, Move down, Move left and Move right.
.
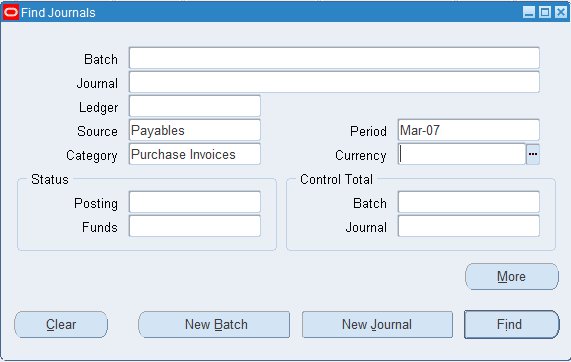
Lets now see how to create a folder and when ever you select that folder, it should display all GL journals whose source is Payables and category is Purchase Invoices and Period is May-07.
Navigation: General Ledger Responsibility > Journals > Enter
Enter the search criteria and click on Find button.
Click on Folder > Save As
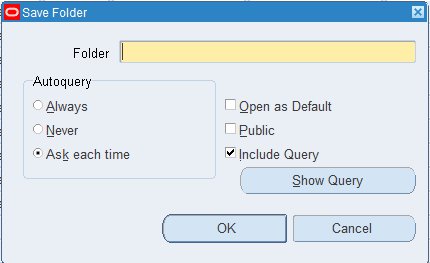
Enter the below details and click on OK button:
1. Enter a meaning name for the folder
2. Select Always, Never, or Ask Each Time from the Autoquery Option Group. If you select
Always: The query will be automatically executed each time you open the folder
Never: The query will be saved but will not be automatically executed when you open the folder.
Ask Each Time: Each time you open the folder, you will be asked if you want to run the query immediately.
3. Choose Open as Default if you want this to be your default folder
4. Choose Public if you want this folder to be accessible to other users
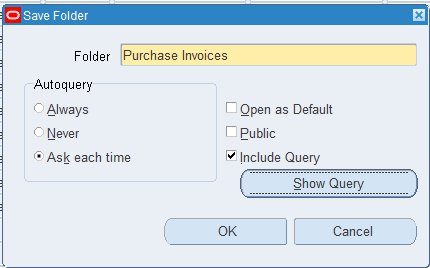
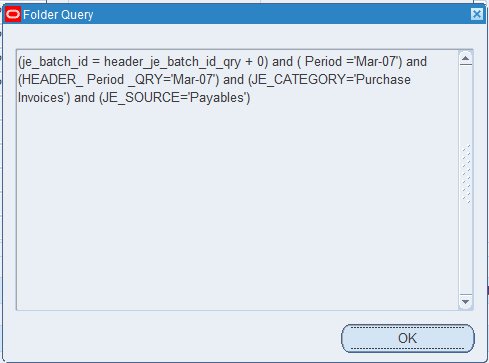
If you click on “Show Query ” Button, you will see the query criteria that you have defined – Period = Mar-07, Source = Payables and Category = Purchase Invoices.
Now you have your folder named Purchase Invoices ready. Whenever you go to Folder > Open and select Purchase Invoices, the data will be displayed as per the criteria you have specified.
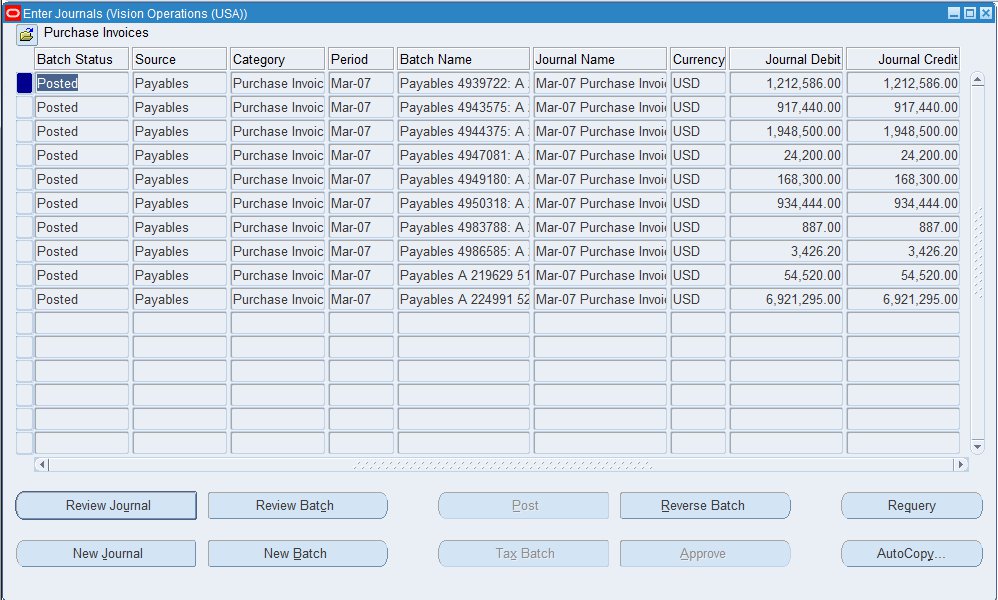
Also you can control what fields to be displayed in the grid.
1.You can hide few fields by going to Folder > Hide Field.
2.You can get that field back by going to Folder > Show field and select the field which you want to be displayed.
3.You can change the sequence of fields by using Folder > Move left or Move right.
4.You can change the prompt of the fields by using Folder > Change Prompt.