Guarantee in Oracle Receivables:
Oracle Receivables supports two types of commitments with our customers:
1. Deposit: Customer commits to buy certain goods from us within a certain time range. He pays the amount upfront and we use it until we run out.
2. Guarantee: Customer commits to buy a certain dollar amount from us over a specified time period. You track their sales to see if they actually spend as much as they said they would. In this agreement, the customer doesn’t make a prepayment.
To know more about deposits click here
In this article we will learn about Guarantee cycle:
1. Create Guarantee when we get into agreement with our customer
2. Create Invoice and apply to this Guarantee when we ship put some goods to the customer.
3. Check the balance on the guarantee after application.
4. Create Receipt when we get the payment for the goods shipped.
5. Apply the Receipt to Invoice.
1. Create Guarantee:
Say our customer has committed to buy $1500 worth goods from us between 1-Apr-2014 to 31-Mar-2014.
Navigation: Receivables responsibility > Transactions > Transactions
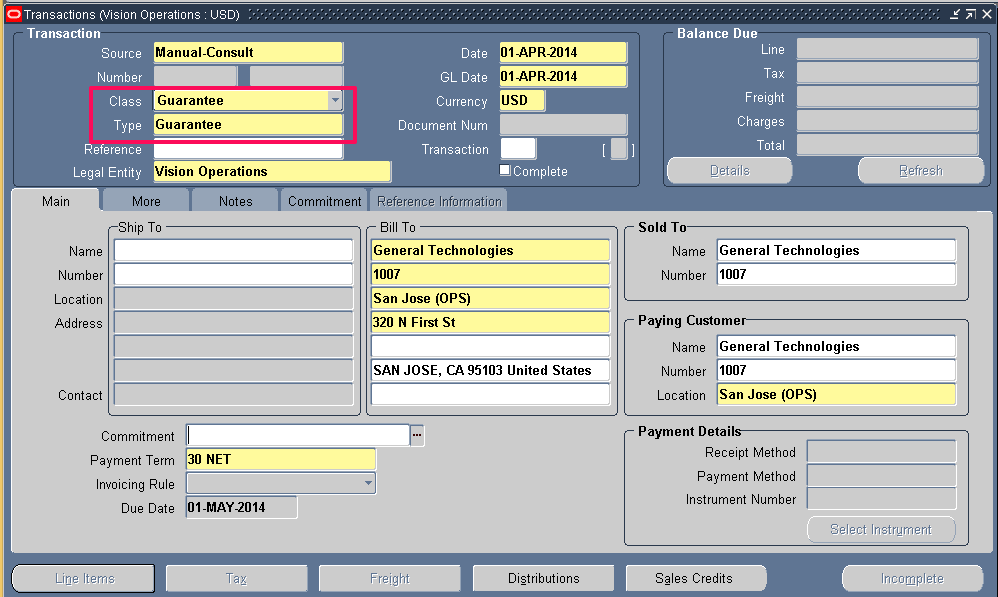
Enter the below details and save.
Class: Guarantee
Type: Appropriate transaction type for Guarantee
Bill to: Customer name
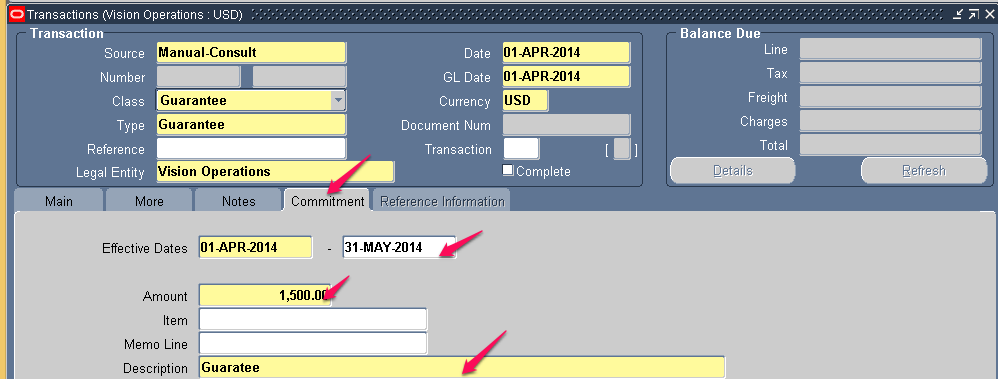
Enter the below details in Commitment tab and save.
Effective Dates: Date range when this commitment holds good. If you don’t enter end date, it will let you enter invoices and credit memos against this commitment indefinitely until the amount due becomes zero. If you enter end date, Receivables verifies that all existing invoices against this commitment are included in this date range. (as per our example enter 1-Apr-2014 and 31-Mar-2014 )
Amount: Enter the amount (as per our example enter $1500 )
Description: Meaningful description
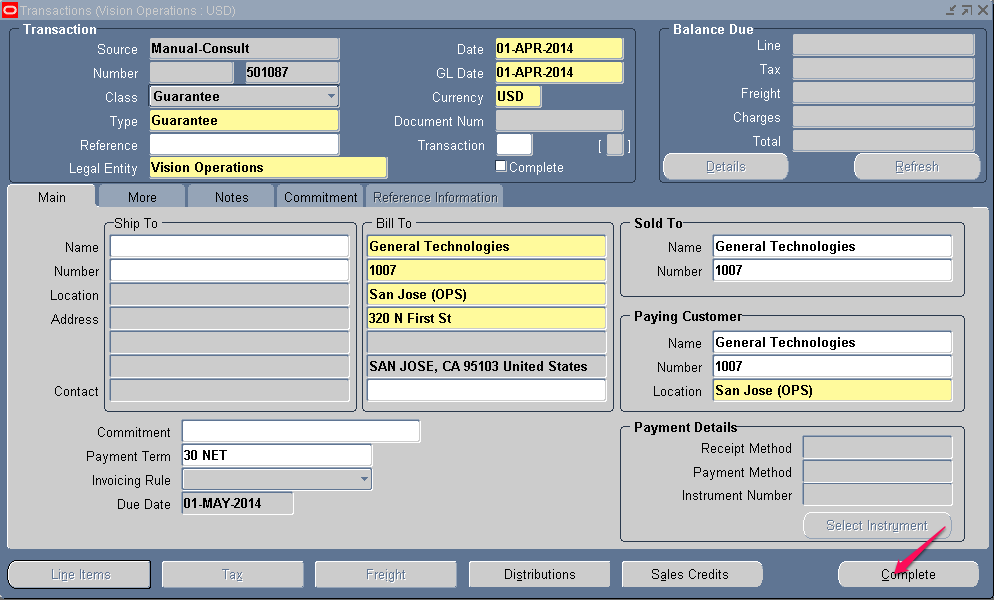
Complete the transaction by clicking on Complete button
2. Create Invoice:
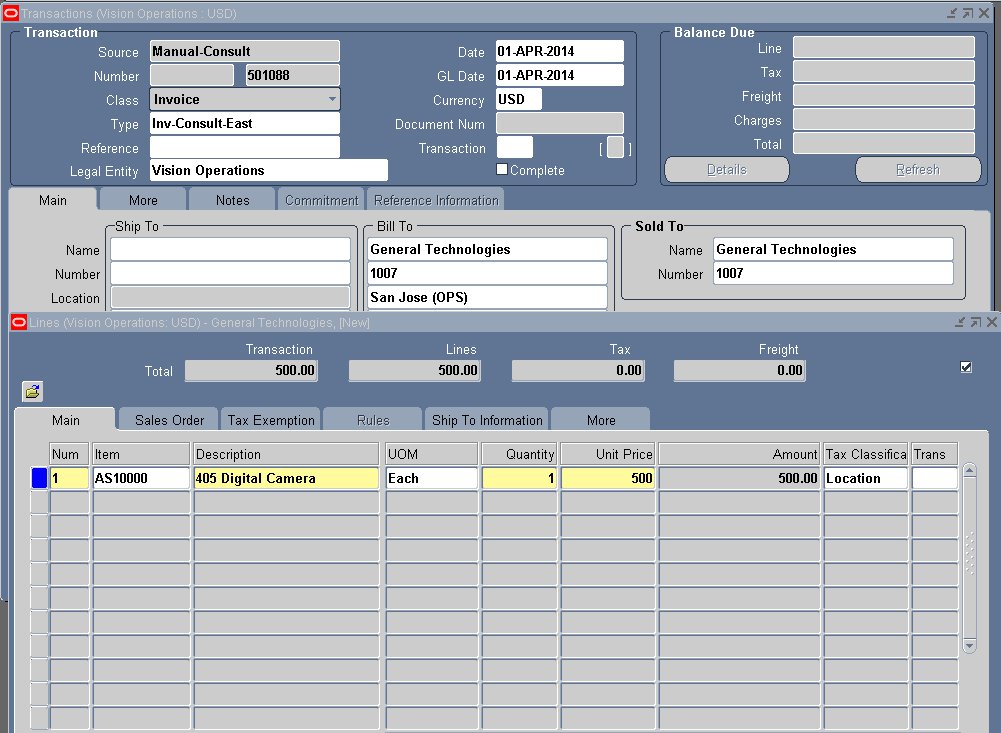
Say we have shipped out the first lot worth $500 to the customer.It’s time to create an invoice for $500.
To know more on how to create invoice click here
Don’t forget to enter COMMITMENT field as the Guarantee number we created in step 1. Doing so will apply this invoice to the guarantee.
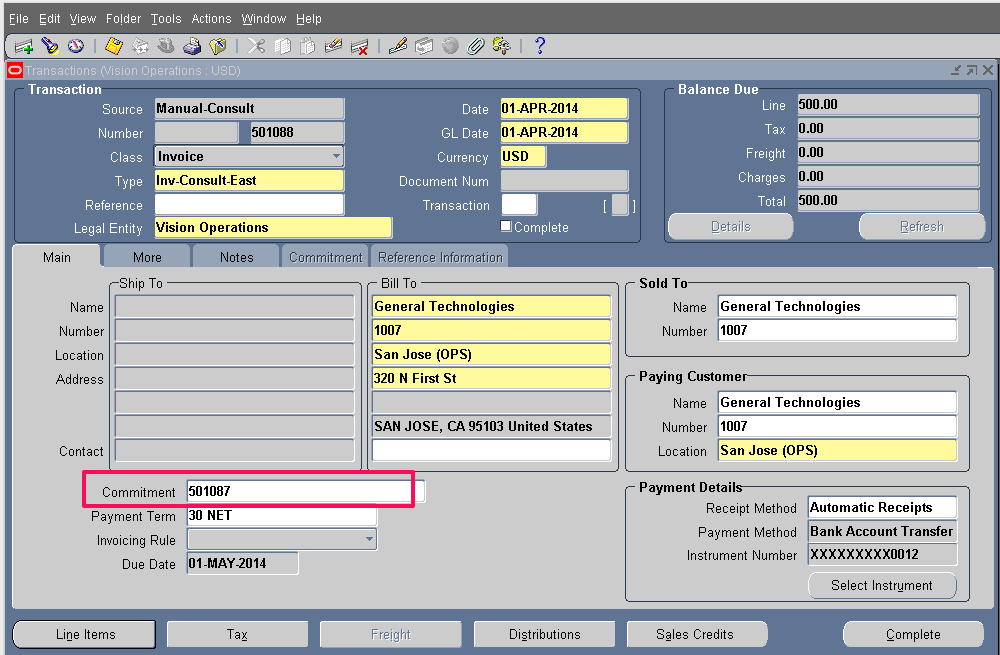
Enter the header and line information and save.
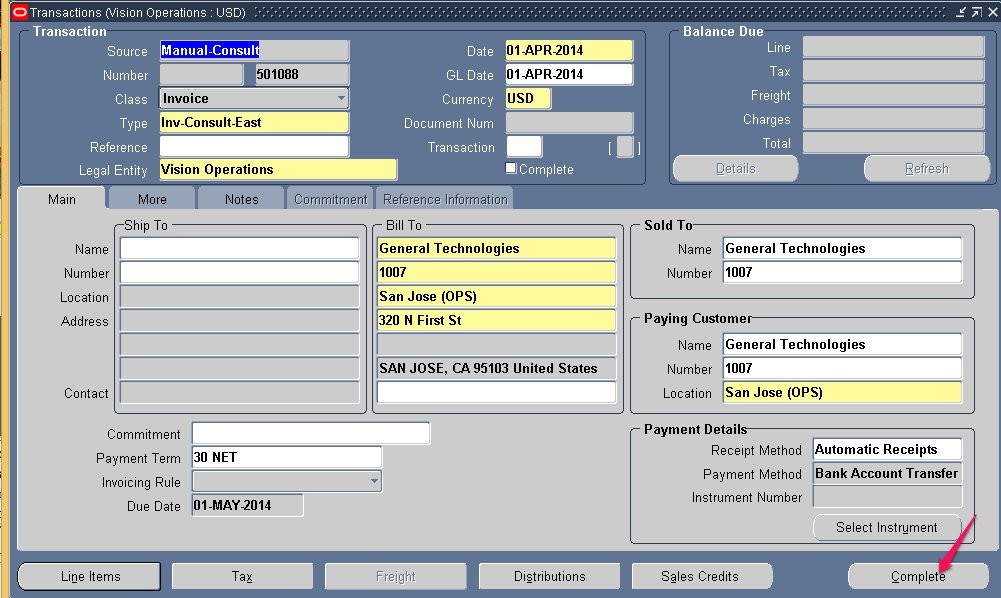
Complete the invoice.
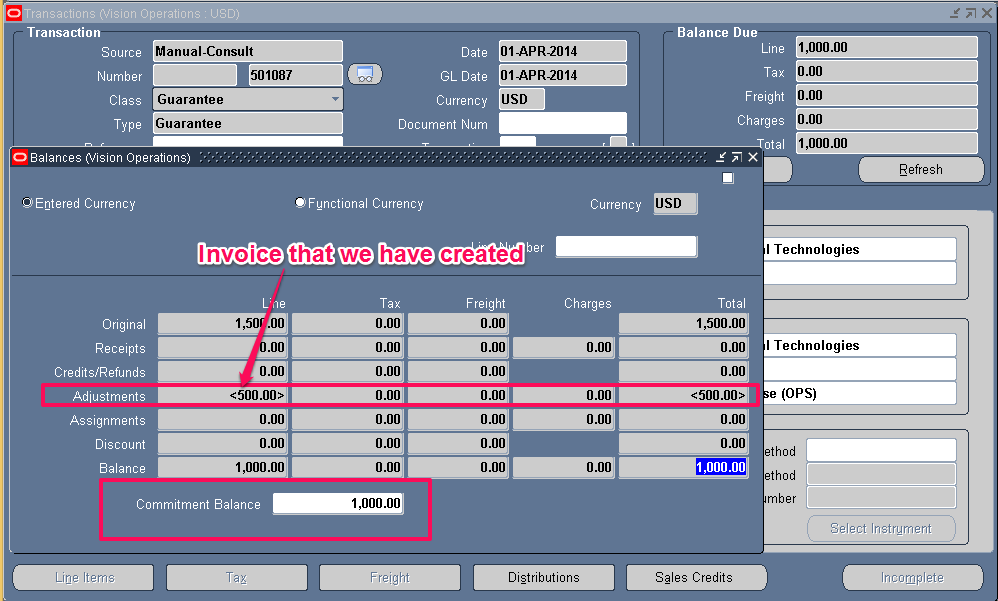
3. Check the balance on the Guarantee:
Now go back to the Guarantee that we have created in Step 1 and check out the balance. Since we have created an invoice of $500 against the guarantee, the guarantees’s balance should come down by $500.
4.Create Receipt:
Now we expect the customer to pay us the invoice amount. When they do, we create a receipt for that amount.
Refer to Step 2 in the article on
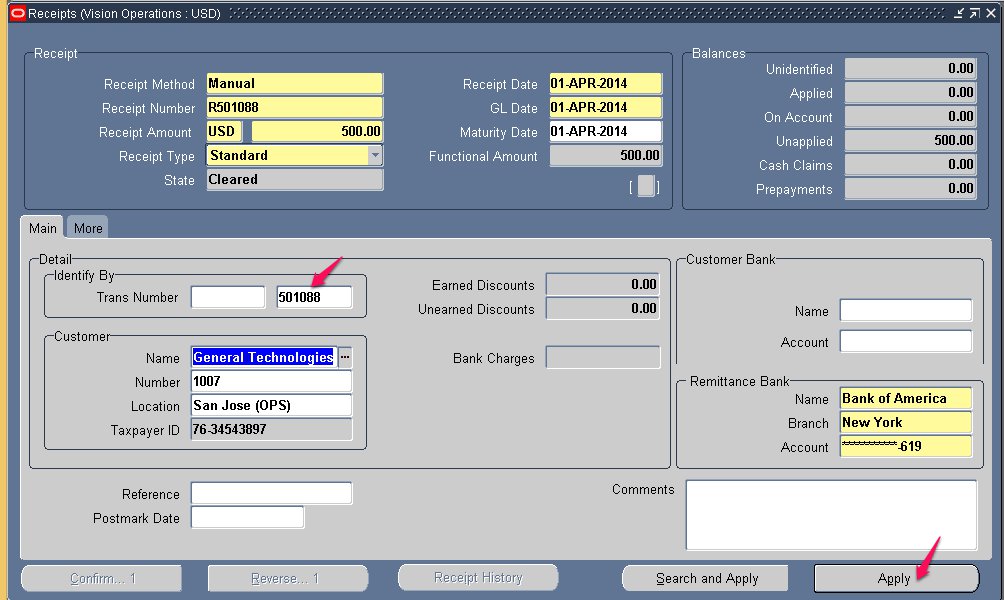
5.Apply the receipt to the invoice by clicking on the Apply button.
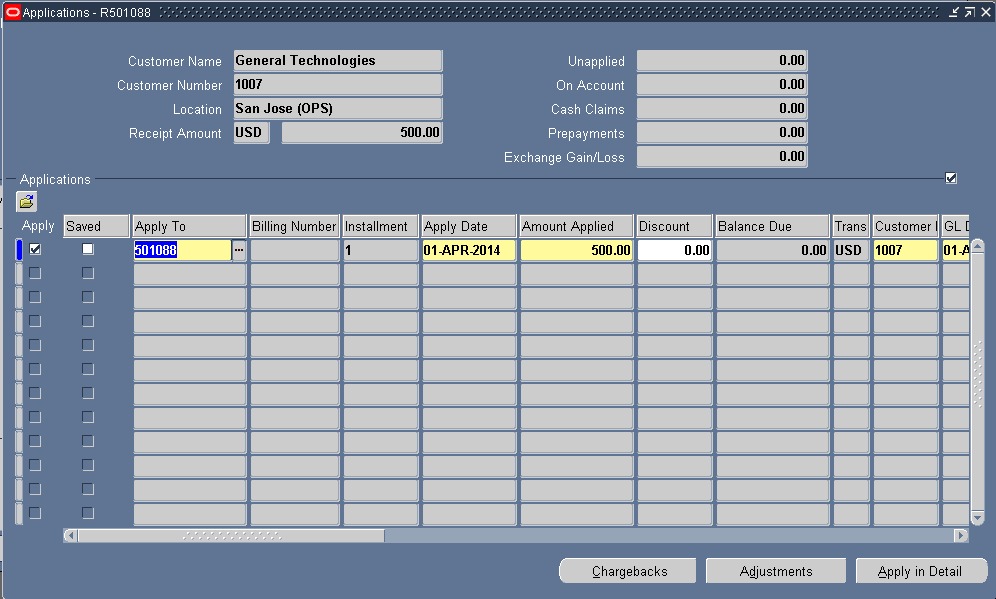
6. Check the balance on the Invoice by clicking on Details button in the Transaction workbench. It will be $0 since a receipt of $500 has been applied to it.
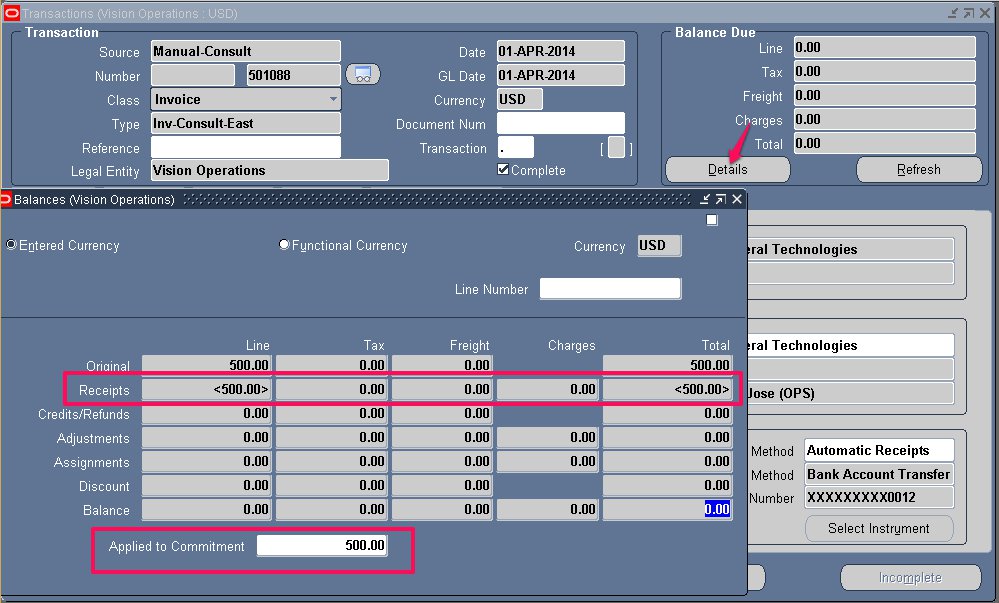
Whenever you ship out goods, you will create invoice against the guarantee. The balance on the Guarantee will come down as and when you apply invoice to the commitment.