Register OAF page in Oracle Applications
We have already seen in our earlier articles about how to configure the OAF and steps to build Hello World page using OAF. In this Tutorial we are going to see how to attach a Hello World Page to Oracle E-Bussiness Suite.
1. Move OAF files to Oracle Apps Server
2. Register the OAF page to Oracle E-Business suite
Step: 1 Follow below steps to move OAF project files into Oracle Apps server.
1. Find the server path where exactly to place the OAF project files into Oracle Applications server
I. Login to Putty

II. Execute cd $JAVA_TOP command to go to the JAVA TOP directory

III. Now execute pwdcommand to get the path where exactly the JAVA TOP is located in your sever.
example: /home/apps/apps/apps_st/comn/java/classes

2. Copy OAF Project Files into Oracle APPS Server
IV. Login to SecureFX or Winscpand go to the JAVA_TOP directory
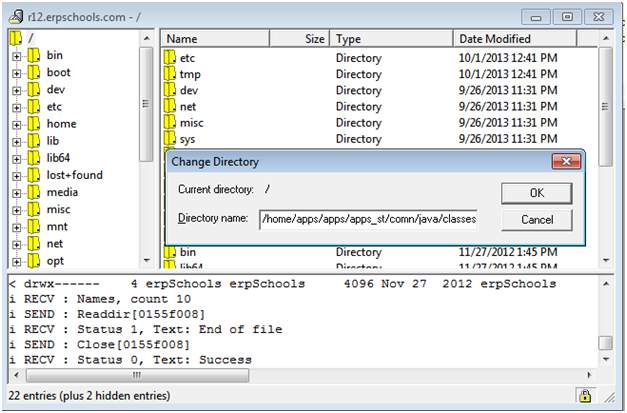
V. Copy all the classfiles from local machine to appropriate $JAVA_TOP directory using SecureFX. On project compilation in jDeveloper, the class files along with xml files are generated in Myclasses folder (D:OAFjdevhomejdevmyclasses) in local machine.

3. Run Import Script
VI. Switch to Putty window
VII. Run the below import scripts for each and every Page and External Regions to redirect them to MDS(Meta Data Service) directory.
javaoracle.jrad.tools.xml.importer.XMLImporter $JAVA_TOP/xxhw/oracle/apps/fnd/helloworld/webui/HelloWorldPG.xml -username apps -password password -rootdir $JAVA_TOP -dbconnection “(DESCRIPTION= (ADDRESS=(PROTOCOL=tcp)(HOST=r12.erpschools.com)(PORT=9376)) (CONNECT_DATA= (SID=VIS)))”
Step: 2 Register the OAF page to Oracle E-Business suite
1. Login to Oracle Application E-Business Suite. Got to System Administrator responsibility to create function. The below image shows the navigation in System Administrator.
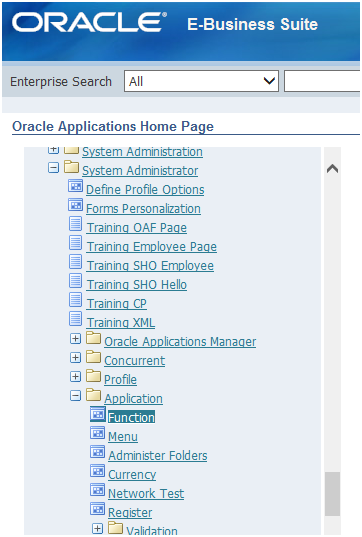
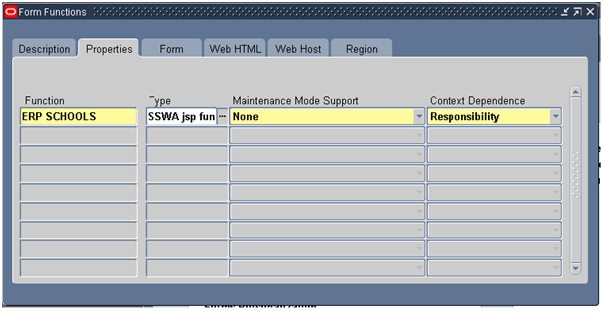
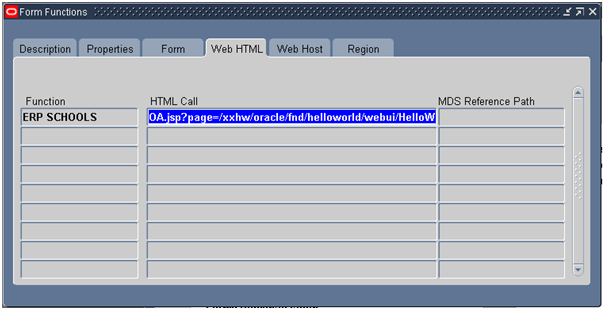
2. Function window will get opens. Give the details in each tab as shown below.
Description:
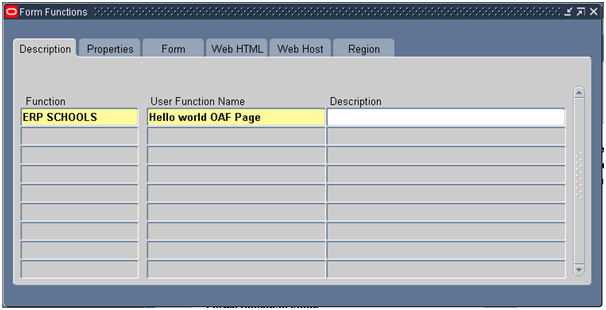
Properties:
Web HTML:
Save it.
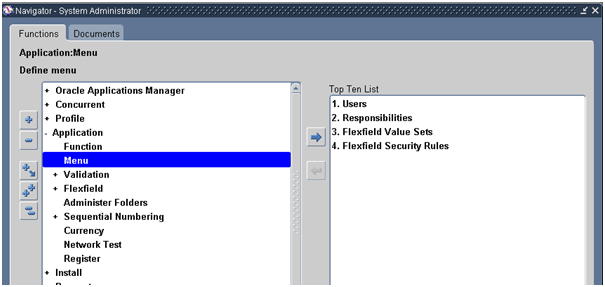
3. Navigate to create menu. Application -> Menu
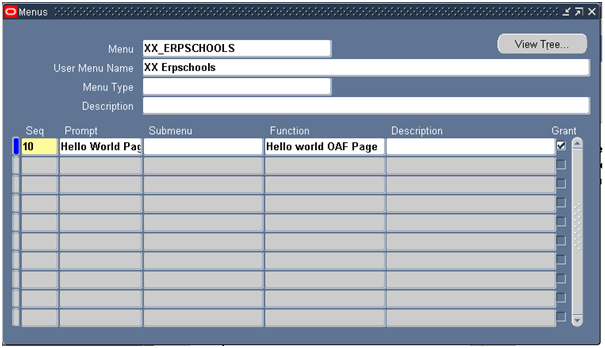
Give Menu name and function name. Design the menu structure according to the Oracle Applications.
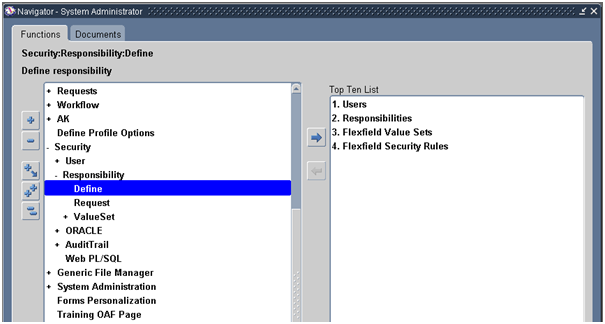
4. Create a responsibility and add menu to responsibility, the below shows the responsibility navigation in System Administration.
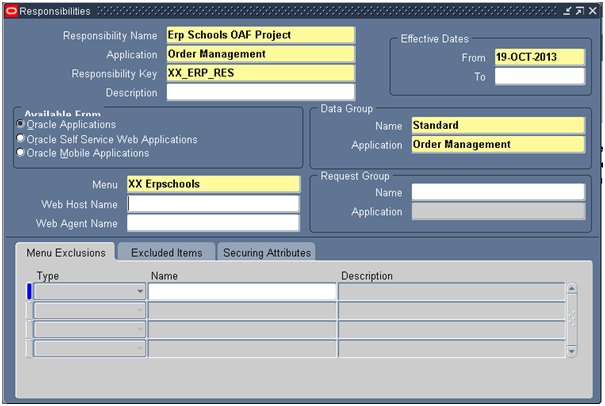
5. Now assign the menu to Responsibility as shown in the below image
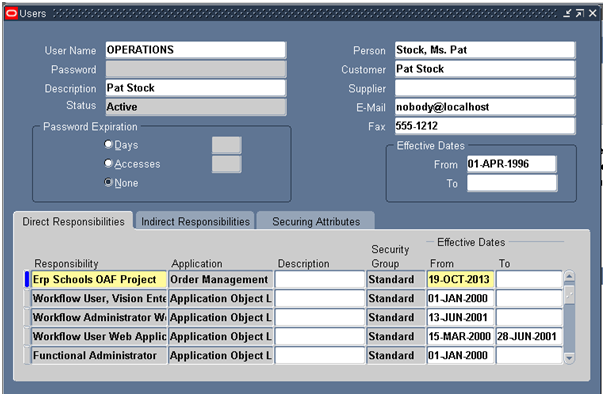
6. Attach Responsibility to the User .
Now Bounce the server to reflect the changes.
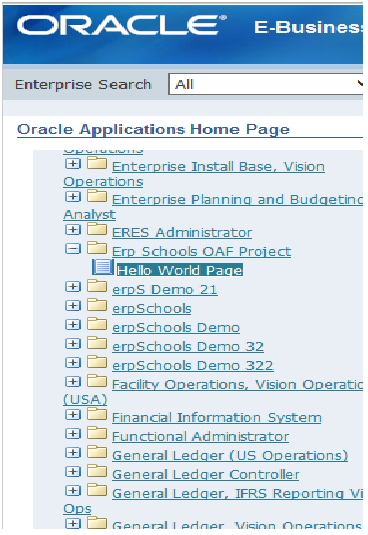
The below image shows the example navigation of responsibility which we attached to E-business suite
