Create Application Module and Controller in OAF:
Creating Application Module (AM):
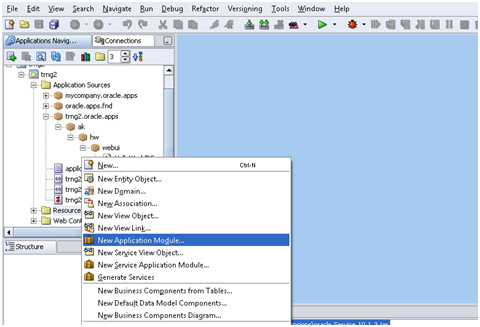
Step1: Right click on Resources under project and select “New Application Module”
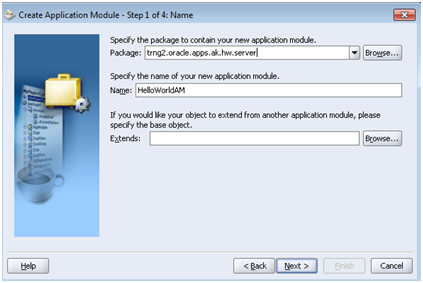
Step2: Specify package “trng2.oracle.apps.ak.hw.server” (AM will be in server) and name “HelloWorldAM”
Extends will be used for customizations when to extend seeded objects
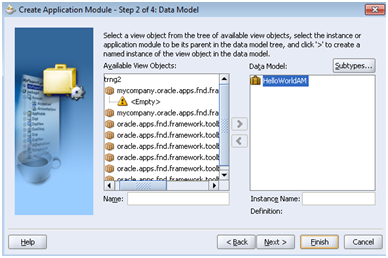
Step3: You need to select VO if AM need to association of VO. Select VO from “Available View Objects” list and move to right “Data Model”. But here as there is no VOs we can skip this step
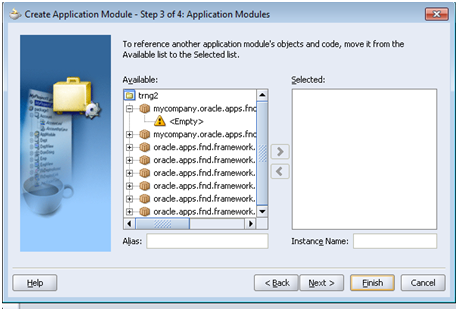
Step4: One AM can refer the objects and code of another AM. But this is not required so you can skip below
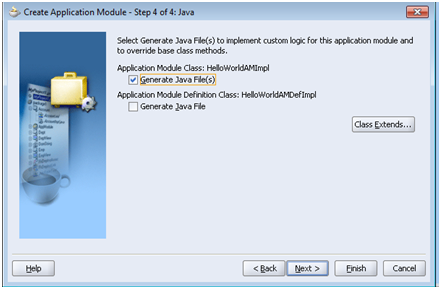
Step 5: Check “Application Module Class” generate java files. Default it will be checked if not check it and click finish
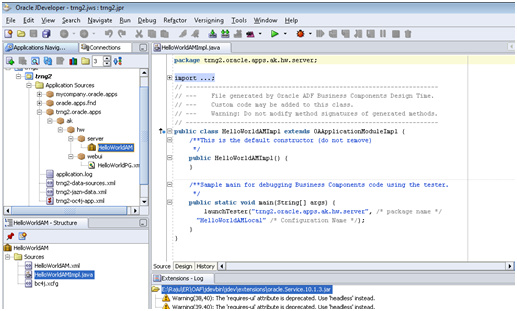
It will also create HelloWorldAMImpl.java file along with HelloWorldAM.
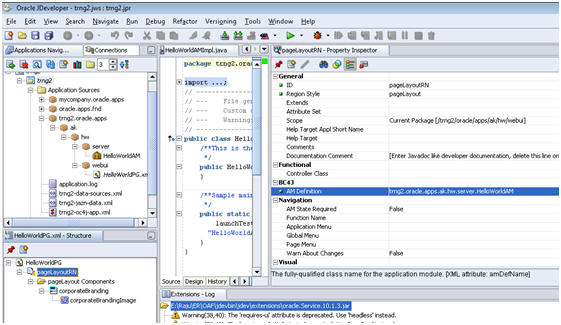
You can now use/set this for the page as AM definition
Creating Controller (CO):
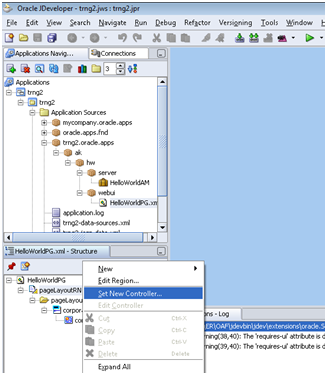
Step1: Right click on Pagelayout and select “Set New Controller”
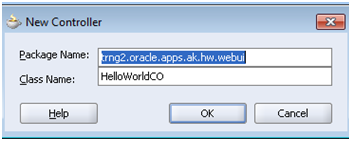
Step2: Specifiy package ‘trng2.oracle.apps.ak.hw.webui’ and name HelloWorldCO
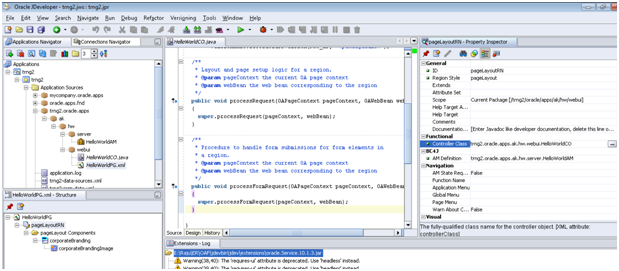
This will create HelloWorldCO.java file as well for main region “Controller Class” property set to this CO
Controller will have two methods Process Request (HTTP get) and Process Form Request (HTTP post). Process request executes while loading the page while process form request executes on any action on the page.
These methods will have two parameters OAPageContext and OAWebBean.
OAPageContext:
• To get and set values of the fields using the OAPageContext.getparatmeter and OAPageContext.putparameter.
• To call one page to another page OAPageContext.setforwardURL.
• To redirect the current page itself use OAPageContext.forwardImmediatelyToCurrentPage (or) OAPageContext.sendRedirect and many more
• Set or get session variables
OAWebBean:
• Each and every field we have properties and the properties define the behavior of item.
• OAWebBean represents the Hierarchy/Structure of the components in the page.
• WebBean represents the properties of item
UI Components:
Region Types:
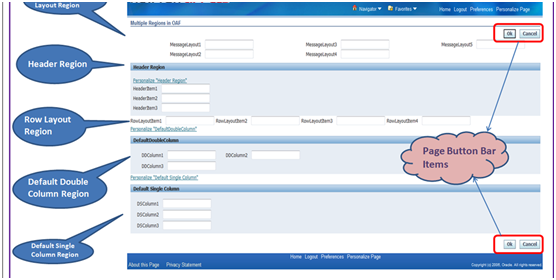
PageLayout is the default and parent region in a page. It is container of other regions and items. Below are other region types
1. Message Component Layout Region (generally used for all text items)
2. Header Region
3. Row Layout Region
4. Default Double Column
5. Default Single Column
6. Page Button Bar (used for buttons to display on top and bottom of the pages)
7. Query Region (used for search pages)
Items:
1. Message Text Input (to input value)
2. Message Styled Text (to display label)
3. Message Check Box
4. Message Radio Button
5. Message Choice (drop down)
6. Submit Button (Button)
7. Message Rich Text Editor
8. Image Item
All above items will be referred as beans. Bean names generally in format of OABean
Ex: OAMessageTextInputBean, OAMessageCheckBoxBean etc.
Note for Radio Button we need to manually (programmatically) setName and setValue for each button to make them as a group. Name should be same for all buttons that should be in a group while value get changed
For example in CO processRequest you can right as below
OAMessageRadioButtonBeanvdir = (OAMessageRadioButtonBean)webBean.findChildRecursive();
vdir.setName(“EmpRole”);
vdir.setValue(“DIRECTOR”);
OAMessageRadioButtonBeanvdir = (OAMessageRadioButtonBean)webBean.findChildRecursive();
vdir.setName(“EmpRole”);
vdir.setValue(“MANAGER”);
Message Layout item:
This item is used to create some special beans in Message Component Layout region. All items or beans cannot be created directly in message component layout region. So for such items we first need to create message layout item and under it we can create those items. Ex: items like submit button, spacer etc
Sample Page with actions:
Requirement Specification: Place two items where on clicking button the value of first button should copy to second item. Input in first item should be as hidden like password
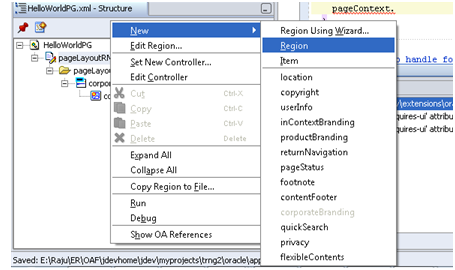
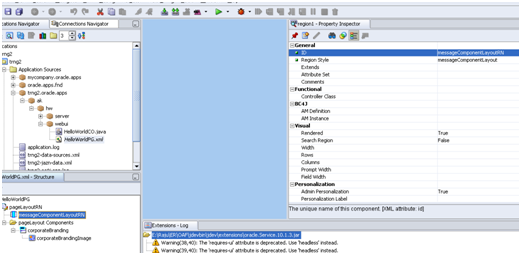
Step 1: In HelloWorldPGright click on default region pageLayoutRN and select New > Region
Step2: Set ID = messageComponentLayoutRN
Region Style = messageComponentLayout
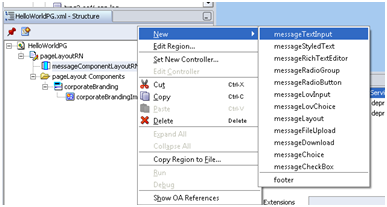
Step3: Right click on “messageComponentLayoutRN” and select New > messageTextInput
Step4: Set properties ID= itemSource
Required = Yes (makes value as mandatory and shows star before the prompt. This is optional)
Prompt = Enter user
Secret = true (optional. Hides the input value like password)
Step5: Create same another messageTextInput and set properties as below
ID=itemTarget
Prompt=Entered User
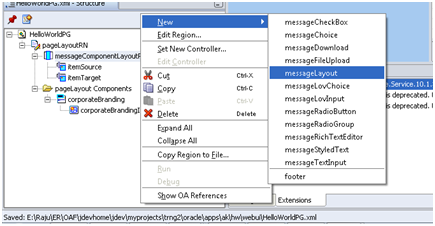
Step6: Right click on messageComponentLayoutRN and select New > messageLayout
messageLayout will contain other item types which cannot be directly on region
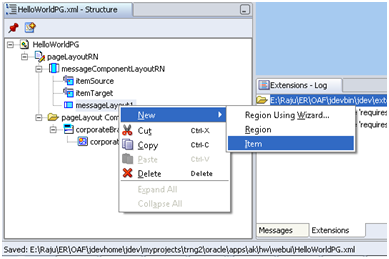
Step7: Right click on messageLayout1 and select New >Item
Set properties of new item1 as below
ID=itemGo
Item Style = submitButton
Prompt = Go
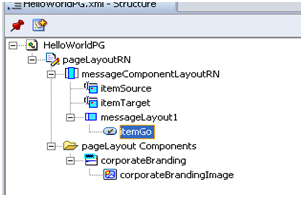
HelloWorldPG structure looks as below
Coding in CO:
In HelloWorldCO and processFormRequest write below code
|
1 2 3 4 |
public void processFormRequest(OAPageContextpageContext, OAWebBeanwebBean) { super.processFormRequest(pageContext, webBean); //above statement is by default generated to call super constructor |
if (pageContext.getParameter(“itemGo”) != null) //when clcked on itemGo
{
String src = pageContext.getParameter(“itemSource”);//get the value of itemSource
OAMessageTextInputBeanl_trgitem = (OAMessageTextInputBean)webBean.findChildRecursive(“itemTarget”);//gets reference of item
l_trgitem.setValue(pageContext,src);//sets value
OAMessageTextInputBeanl_srcitem = (OAMessageTextInputBean)webBean.findChildRecursive(“itemSource”);//gets reference of item
l_srcitem.setValue(pageContext,null);//makes item empty
|
1 2 3 |
throw new OAException(src,OAException.ERROR); //other type of exceptions are WARNING/CONFIRMATION. It will throw this message on page } } |
