This article will show how to setup pricing agreements.
Note: The Agreement Field does not display by default on the Order Management Sales Orders Order Information window. Folder technology
Navigation: Pricing > Pricing Agreements
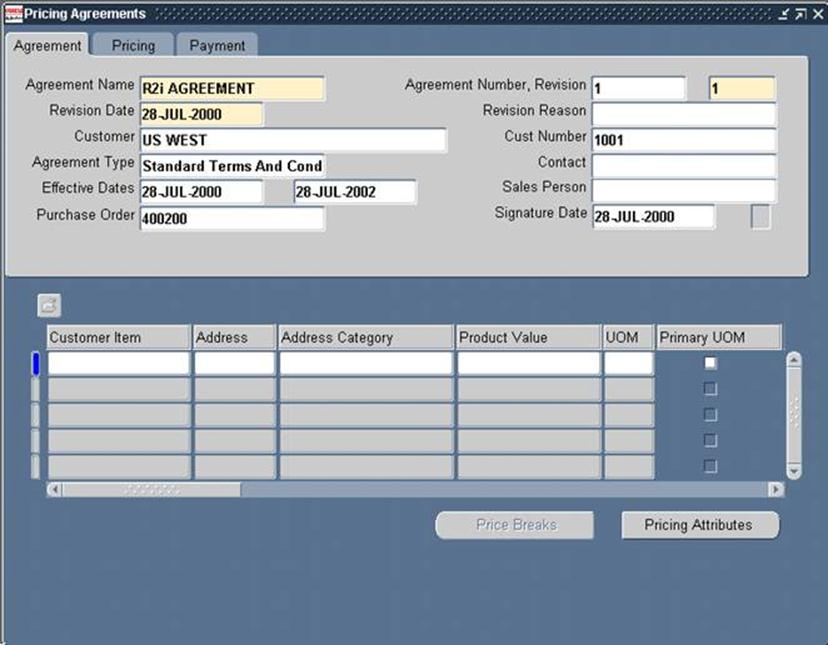
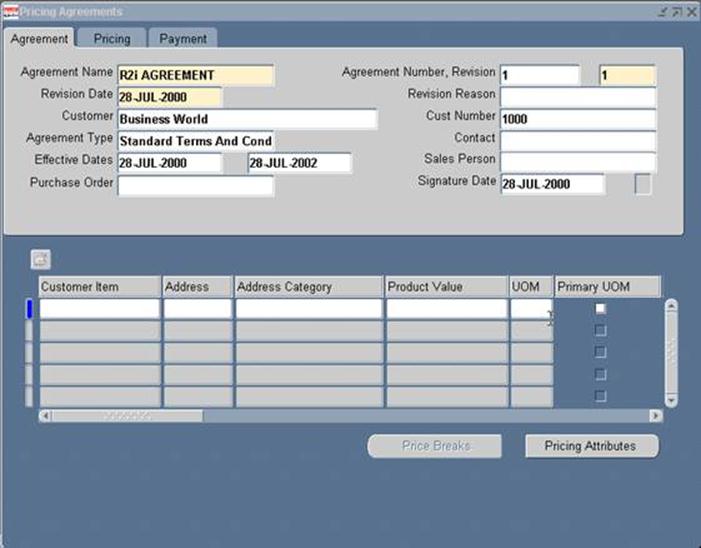
The Pricing Agreements Agreement Tab:

Enter the Following:
Agreement Name: Enter the name of the agreement
Agreement Number, Revision: Enter an agreement number and revision number.
Customer: Select a Customer if the agreement is only valid for a specific customer (optional).
Agreement Type: Select an Agreement Type.
Contact: Enter a Contact for the customer (optional)
Effective Dates: Define the Effective Dates for the Agreement (optional). The effectivity period defaults from the current date to two years from the current date.
Sales Person: Enter a salesperson name.
Purchase Order: Enter the customer’s purchase order number (optional).
Signature Date: Select a Signature Date (optional)
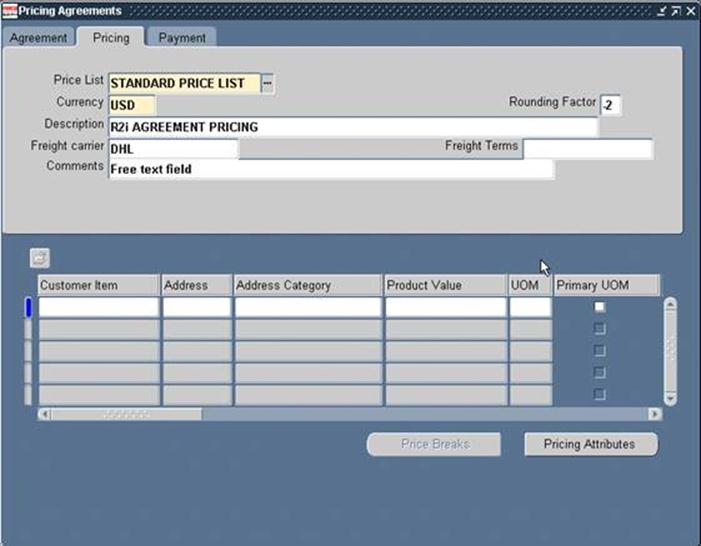
The Pricing Agreements Pricing Tab:
 |
Price List: Enter or select a pricing list to associate with the agreement. NOTE: The list of values for the price lists in agreement references other agreements. The agreement feature does not use price lists that are created in the Pricing>Price
Lists>Price List Setup.
Currency: Enter Currency.
Rounding Factor: Enter Rounding Factor.
Description: Enter a Description for the Price List.
Freight Carrier: Enter default Freight Carrier from the list of values.
Freight Terms: Enter default Freight Terms.
Comments: Enter any Comments associated with the price list.
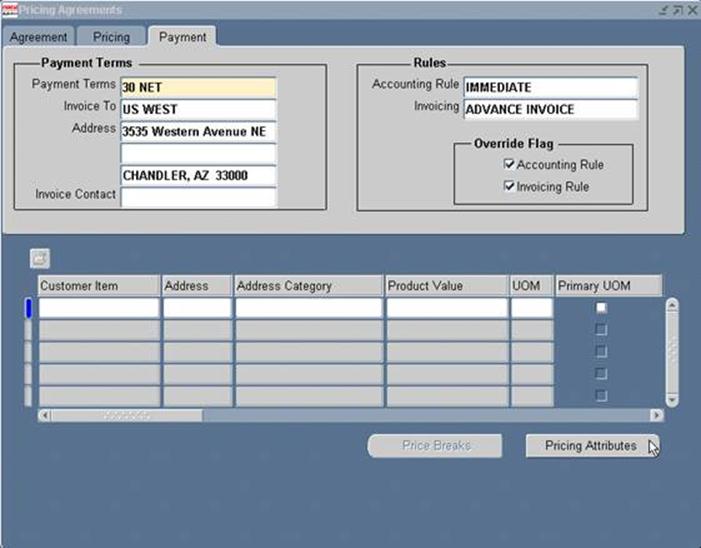
The Pricing Agreements Payment Tab:
 |
Payment Terms: Select Payment Terms from the list of values.
Invoice To: Enter the bill-to name.
Address: Enter the bill-to address.
Invoice Contact: Select an Invoice Contact from the list of values (optional)
Note: If the Invoice to Address and the Invoice Contact are entered here, they will default into the Sales Orders Order Information if the Agreement is selected.
Accounting Rule: Select the Accounting Rule you want to apply for orders placed against this Agreement. The Accounting Rule controls the amounts and timing of your revenue recognition. Receivables must be fully installed to define this rule (optional)
Invoicing Rule: Select the Invoicing Rule you want to apply for orders placed against this Agreement. This controls the amounts and timing of your invoices. Receivables must be fully installed to define this rule (optional)
Override Flag: Check the Accounting Rule and/or Invoicing Rule override check box to permit overrides of these Rules when placing orders against this Agreement. When this check box is selected, Order Management overrides these Rules if you order items with their own specific Rules (optional)
The lower region of the Pricing Agreements form, Customer Item
 |
Customer Item: Enter a Customer Item. A customer item is a pricing attribute. When you enter a customer item, Pricing creates one pricing attribute and one product for the agreement line for the customer item and its corresponding internal inventory item.
Customer Address: Enter a Customer Address.
Customer Address Category: Enter a Customer Address Category.
Product Value: Enter an inventory item number in Product Value.
UOM: Enter a unit of measure.
Application Method: Enter Unit Price for Application Method.
Value: Enter base price in the Value field.
Start/End Dates: Enter the effectivity dates in Start Date and End Date.
Line Type: Select Price List Line in Line Type.
Comments: Enter comments as appropriate.
Revision: Enter a revision number in Revision field. This revision number is not dependent on the agreement revision number.
Revision Reason: Enter a Revision Reason.
Revision Date: Enter a Revision Date.
Defining Pricing Attributes:
Choose the Pricing Attribute Button.
- Enter a product context.
- Enter product attribute.
- Enter product value.
- Enter pricing context.
- Enter pricing attribute.
- Enter values in Value To. You cannot enter Value To and Operator in the Pricing Attributes window.
Defining Price Breaks:
Choose the Price Breaks Button. (Note: The Price Breaks button is enabled only when you select the Price Break Header in Line Type on the agreement line).
- Enter the Pricing Context.
- Enter the Pricing Attribute.
- Enter the Value From.
- Enter the Value To.
- Enter the list price in Price field.